
Welcome To Our Gallery
This our place where you will see some of our start and finish products and our current projects. The projects closer to the top are old projects. You will find our latest projects and current projects down at the bottom.

Before

After
The new siding on this 73-year-old house made it go from jaded to an absolutely stunning view. The new black shutters really made the green siding stand out.


Before

After
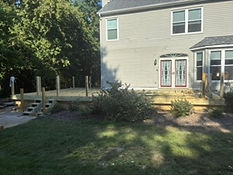
This new deck does not only look good it also provides shade for this womans dog. It also gives her space to enjoy the sunlight and also a structural railing. Whereas before, the railing to go down the stairs was wobbling and not in good shape.


This was originally a garage that was never used by this couple, due to insufficient heat and was not what they wanted or needed. Not only did their heater not work but the whole garage had no insulation. The loft up above was hard to get into and also was not being used, it was just taking up wasted space.


Before


The work done to this garage was a lot and a major improvement. After the walls were opened up, new lighting and new insulation was installed. A new heater was installed to keep them warm and a fan was put in to keep air flow. Two new rooms were added, one as a laundry room and the other a closet. New flooring and wall paint were added to give the room the final touch for a great sitting area.
After


Before
This back deck was good for some seasonal sitting and family gathering, but not what these people wanted. They wanted something big enough for their growing family and a sturdier railing to hold on to when they walk down the steps. So we extended the deck and put in a nook for the for the grill. We also made the steps wider and put new decking in. The clients were very happy with the end result

After


Before


This customer had a broken shower door and there were shards of glass everywhere. We quickly got the shower cleaned, took out the doors, walls, and shower pan. We replaced all of that with a new shower that was stronger and not as prone to break.


After


Before


After


This family wanted a new bathroom that would look beautiful. We gutted the bathroom, meaning we took out the shower, the sink, the toilet, the walls, the floor, and the ceiling. We replaced all of that with some new lights, new drywall, new shower, new sink, new toilet, new flooring, new cabinets on one end, and fresh paint on the walls. The customer was very happy with everything that was done with this job.


Before the project
Results of the project


Our Latest Completed Project
you will see here that we have started a deck on 9/8/26. the job is to completely demo the deck and to replace it. We will add some more space to it and a portion will be screened in.


The pictures above consist of the start of the demolition. The pictures below is the end of the demolition. The customer requested that we save some of the deck boards for his own projects, but other than that everything went from the deck boards to the framing.


The pictures above are of the holes we had to dig for footers. There was a total of 13 holes. each one had to follow code which is 36 inches deep and able to fit one of the sauna tubes in them level to the ground. Each sauna tube we have is 17 inches wide. The pictures below are after the inspection is done and concrete is poured into them.


The pictures shown above here is the start of the framing for the deck. We had to put backbones in first before we did anything else. The pictures below show some more framing going on but this is to make sure the deck is sturdy and structural.




The images above consist of the finished framing of the deck, and the pictures below is the start of the installation of the deck boards.


The pictures above are from the finish of the installation of the deck boards and the next step would be to put azack around the posts, the steps, the face of the deck, and the railing posts; which is what you will see in the pictures right below.


After we got the azack for the deck installed as you can see, we put the railing up. When that was done, we started framing for the screened in porch and we also sheathed it for where there won't be any screen.


Here in these pictures you will see the start of the walls being installed with ship lap and you will also see the siding being done.


In this set of photos the work here being done is the finishing of the installation of the ship-lap on the walls. You will also see that azack has been installed around the edges of the doorways and the windows.


In these pictures you will see the finish of the inside complete with a fan and the ceiling is done. in the other pictures you can see the start of the lattice work that we did. At this point screens were also installed into the windows, and we replaced the glass doors were replaced with screens.


Here in this section of photos you will see the finished product of the deck and screened in porch. We took care to clean everything up and make it look really nice for the customer and we finished the lattice. The customer was very happy with the quality of the product.


This job was started on 9/8/26 and was finished on 10/6/26. The photos above showcase the start of the deck while the ones below is the completed deck.


Our Current Project
Kitchen remodel 10/7/26
In the following pictures you will be able to follow the kitchen remodel we are currently working on. The pictures below are taken before there is any demolition done therefore making it the start pictures.


Day One: 10/7/26
In the pictures below you can see the start of the demolition. All the cabinets came out along with most of the appliances. The customer wanted to keep their dishwasher and fridge. After that we took out the countertops and then the cabinets under them. We also took out the back splash and started to take out the tile floor.


Day Two: 10/8/26


In these pictures of day two there is more demolition going on. Here we finished taking up the tile. Underneath the tile was a layer of hardy which usually goes under tile along with another layer of Luan. We had to take both of those up as well to get to the bare floor that was under it all.


